How To Raise Urban Chickens & New Minneapolis Policy
I'm not sure how many of you reading this know our full story. Neither Betsy nor I started out as farmers. We both grew up in the suburbs. As we learned more about food and nutrition, we realized how important it was to raise animals the right way. I know a lot of my old co-workers thought I was a little crazy for leaving my job to start this farm without ever doing anything like this before. And believe me, there was a lot to learn along the way. With that in mind, I'd love to share some tips for any aspiring urban chicken farmers!
Congratulations to the city of Minneapolis for making a great change and leading the way towards modern urban farming!
In case you haven’t heard the news, Minneapolis recently approved some key changes to their backyard chicken permits:
- The requirement that residents must get approval from a neighboring household to be allowed to own six or fewer chickens, turkeys, ducks or pigeons was eliminated.
- Commercial licenses for egg sales will be available for up to 30 birds.
- Composting of chicken manure will be allowed.

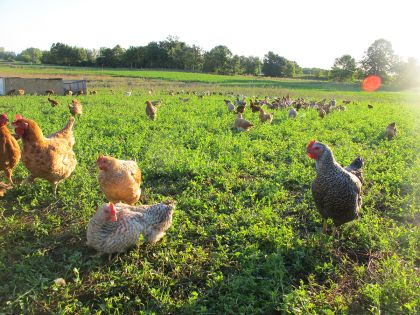
These are great changes! Chickens are best in small flocks, they are very social animals and can keep track of up to 1000 other individuals in their flock. Problems really start happening when even those nice ‘local’ farmers have big operations with thousands of birds in one flock. We have small flocks for our laying hens and can’t wait to see more small flocks around Minneapolis.
(Of course, we have to mention at least once: If you want backyard style eggs without having chickens of your own, check out our amazing organic fed pasture raised eggs, meats and hand-made sausages, and ready to eat pasture raised meals.)
For those of you aspiring urban chicken farmers thinking of raising your own eggs, here are some tips that we've learned along the way I think you'll find helpful.
Tips if you want to sell your backyard eggs
Some quick resources
- The Heavy Table put together a great guide about The ABCs of Urban Chicken Farming a few years back. Information like coop design, where to get your chicks and other supplies and more. This is a great article for would-be urban farmers.
- The subreddit Backyard Chickens (/r/BackYardChickens/) has an amazingly active community with all sorts of tips and people quick to answer questions you might have along the way.
- The website www.backyardchickens.com is also a good resource.
- Here are the State of Minnesota requirements for the handling, cleaning and candling of eggs that are sold.
- Here is the Minneapolis Code of Ordinances relating to Animals and Fowl.
- If you want to sell your eggs, you'll probably need to register with the state. It is free but they just want to make sure you've read and understand the safe handling requirements. Here is the form to do that. Obviously if you want more than six hens, you also need to register with the city of Minneapolis.
When we read all those requirements, I realized the rules for the state of Minnesota were pretty restrictive for small flocks in comparison to other states. Here are some practical tips for the backyard commercial flock:
How To Clean Eggs
You’ll need to follow the State of Minnesota’s guidelines for washing eggs. Our state has some of the strictest rules for how eggs are washed. You may NOT submerge the eggs in water at any time or use a wet rag to clean them.
Here is what we recommend for a small home flock:
- Get a small plastic bucket, maybe 1 gallon and drill some ½” holes in the bottom and lower parts of the side. You can often get a peanut butter bucket from your local co-op for free.
- Use this as your collection bucket for any dirty eggs. You can keep perfectly or nearly clean ones in another basket.
- Put the bucket into a fridge for a couple of hours. This gets the eggs colder and will reduce the risk of contamination when you wash them.
- Place the bucket into your utility sink and run hot water over them. Your water heater might need to be turned up to accommodate the state's rules.
- Wash the eggs by rinsing in the water. You can rub them a bit with your hands or a plastic abrasive, but cloths are not allowed. For the most part they should come clean with just a light rubbing.
- Set the eggs on a rack or somewhere that you can spray them as required by state regulations. We used to use these racks.
- Spray the eggs with an approved anti-microbial spray. Big operations have specialty sprays they use, but you can also mix a bit of chorine with water and spray a light coating on the eggs. Get a small spray bottle like this. I have tried many kinds, and they all break after continual use -- if you find a good one, let me know!
- Let the eggs dry or wipe clean with a dry towel.
- For the almost clean eggs, we found that using some sand paper worked really well to clean up little scuff marks. At some point it became eaiser to just wash all of them, but with a small flock, sanding on a nice summer day is much nicer than washing!
- Proceed to candling.
How To Candle Eggs
If you are going to sell eggs, you need to candle each egg to look for cracks or other defects before the sale. While this is a regulation,it is also good business. Sure we never did that for our personal flock before we sold eggs, but when we’re selling eggs, we want to make sure there are as few defects as possible.
Tools you need:
Online you can find all sorts of fancy ‘candlers’ and the advice we found was really fractured and outdated. Here are the tools we recommend after years of experimenting:
- Flashlight: Get an inexpensive, but bright LED flashlight that is a bit less than the diameter of your eggs, something like this.
- Rechargeable batteries: I recommend these higher capacity ones, they are very reasonably priced.
- Good battery charger: One that can charge a single battery at a time and is smart enough to discharge and recharge the battery to extend its life. This is the one we eventually purchased, it works SO much better than the cheapo one we first got from the hardware store.
- A piece of flexible tubing that is also a bit smaller than the same diameter of your eggs (a piece of old garden or irrigation hose, rubber hose from the hardware store, etc).
- Duct tape
How to candle:
- Cut the hose to be a few inches long and tape it to the end of the flashlight such that no light escapes out the sides, I sometimes put a thin piece of cardboard or triple layer the tape to get less light to leak out.
- In a dark room, place the egg up to the flashlight and spin the egg
- Look for cracks, air bubbles, dark shadows that have a solid edge around them, anything that is odd looking. Every hen and every egg is different so this will take some time to learn.
- If you feel you’ve found something out of the ordinary, crack that egg and see what it was so you can train yourself what to look for and what to ignore. Over time you’ll get to doing this so fast you aren’t really thinking about it at all, I promise. Just hang in there!
- New hens (pullets) often have more defects than mature layers.
Example of an egg with a small crack
Grading and sizing your eggs
Grading
You are required to grade your eggs. That sounds kind of overwhelming at first, but it is really simple. Here is the USDA's guide to grading eggs.
Here are some things to remember:
- If you have done a semi-reasonable job at candling the eggs, you shouldn't have too many defects. You're allowed a few defects here and there with AA eggs, but we've always graded ours A because that way we've got a nice buffer to any mistakes.
- The grade of the egg also has to do with how fresh your eggs are. Once you candle the eggs, if they are brand new, they'll be AA nearly every time. After about 10-14 days of refrigerated storage, they typically grade at A and 20-30 days will grade B.
- Once you candle and grade the eggs, you have 30 days to sell the eggs (see labeling requirements, below)
Sizing
Having a small flock means the size of your eggs will be pretty consistent and you'll know the average weight of each dozen without too much fluctuation. If you have new pullets, you may need to check a bit more, but once they are mature, you'll be good to go:

Egg Labeling and Storage Requirements
Labeling
You'll also want to follow the Minnesota Egg Labeling Requirements.
This is fairly simple:
- Include your name and full address.
- Grade and size of the eggs
- The julian date of when you packaged these eggs (julian dates are just the number of days since Jan 1 of that year -- so Jan 1st is 1, Jan 2nd is 2... Feb 1st is 32, Feb 2nd is 33, etc). Here is a julian date calendar for reference.
- The sell by date, actual date which is 30 days from when you package the eggs
- For example, if you packaged the eggs on June 1st, the label would need to read: 153 sell by 07-01 We've got a nice label gun to help with this, but you can just hand write it on the side of your carton with a sharpie.
- You also need some sort of safe handling instructions... if you are reusing an old egg carton, that will already be on there. But if you have new blank ones, include: “To prevent illness from bacteria: keep eggs refrigerated, cook eggs until yolks are firm, and cook foods containing eggs thoroughly.”
- Here is a great resource for bulk labels, but here are the ones we used when we had a smaller flock.
Storage
Eggs must be stored at 45 degrees or less and transported at 40 degrees or less. I would think on a small scale, a spare refrigerator is sufficient for home storage, but if you find that you'd like a larger option, I highly recommend checking out the coolbot system. They are fairly inexpensive and super energy efficient. Actually a great way to get a root cellar type storage for other things as well.
Whew
I know there are a lot of tips in here but really, it's not all that complicated. People have been raising animals for thousands of years. I can't think of anything I've done in my life that has been as rewarding and making me feel as connected to the land and to my neighbors. I'm also sure that people reading this will have thoughts or tips of their own. Keep the conversation going! What do you think?
Also: I didn't haven't written any specific tips on raising an urban flock...
Are you a urban farmers with tips to share? Please do!
Anything else we missed? Good luck!
-Jack
Jack McCann is the owner of TC Farm. TC Farm is a meat and egg CSA located about an hour west of the Twin Cities that makes monthly deliveries of pasture raised beef, pork, chicken, hand-made sausages and eggs to over two dozen pickup locations across the Twin Cities.





Comments (0)
Add a Comment
Add a Comment